Back to the storyline. In thinking about this sweater, in my mind I use the term ‘cardiganize.’ It’s not a real word, I know. It reminds me of a favorite musical, Guys and Dolls, when Miss Adelaide tells Nathan Detroit ,“Take back your mink to from whence it came, and tell them to Hollanderize it for some other dame!” (The common meaning of Hollanderize, in the 1940’s and 50’s, was to dye the cheaper, plebeian, widely worn muskrat coats to give them the look of mink.) Enough singing, on to the buttonband.
There are two basic ways a knitter can approach this.
Method One: Make a gauge swatch with your chosen stitch, yarn and needles. Measure the front of the sweater, and calculate how many stitches you will need to make the band.
Method Two: Wing it, picking up stitches willy nilly. Then, when you have about three-quarters of an inch of wavy mess of buttonband, go back to Method One. Guess what method I chose first?
I picked up a little over 200 stitches. It was hard to see where to pick up, since the sweater has slightly felted. The normal ratios (3 sts for 4 rows, roughly) didn’t work out so well. Although I did have a wavy mess of buttonband, I at least could use that as a gauge swatch – 7 sts to the inch, on a 2.5mm needle. Slightly tighter might have been better. I have no idea what size needle I used originally on this sweater, and I have no notes on gauge or any swatch I could find. (Seriously, though, I didn’t look very hard.)
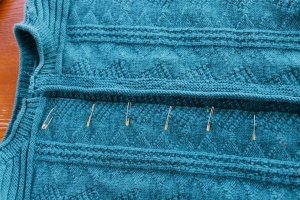
I ripped out the sts, then measured the front: 22.5 inches. I removed ½ inch for simplicity, then placed coiless safety pins at 2 inch intervals. 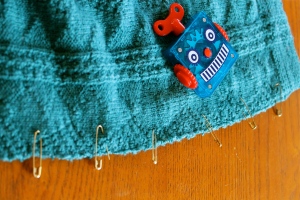
This gave me 11 spaces, and I would ideally pick up 14 sts in one space, then 13 in the next. I am believer in picking up as many stitches as necessary (within reason) to avoid gaps, and then decreasing on the subsequent row to get the correct number of stitches, so that’s what I did.
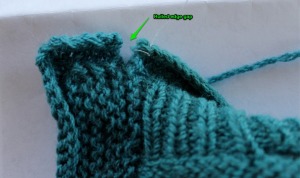
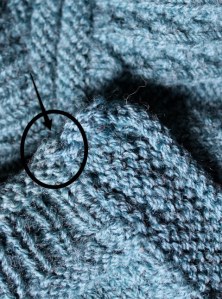
I chose a garter stitch band, partly to match the cuffs and bottom band, but partly because I am lazy and I knew garter stitch would work. I added a rolled edge to try and tie in with the neckband. The tricky aspect of that was that it doesn’t quite tie in with the neckband. I did a little mattress stitch, then sewed it down so it wouldn’t unroll at that spot, revealing my slacker knitting style. I just keep reminding myself that I wasn’t wearing it, so it’s ok, at least now I’ll wear it. (I’d better, after all this.)
You can see the before and after here:
It doesn’t look too terrible. As my Gramma always said, “A dark night on galloping horse, you’ll never see it.”
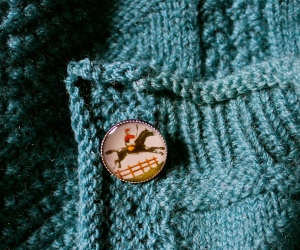
And speaking of galloping horses, look what I found in the button tin:
I bought these years ago, and it seemed quite appropriate.
MLE





LOL about the buttons! They do seem appropriate. 🙂
That’s more work than I would be willing to do to rescue a sweater, so congratulations for starters. (Peter put a serious hole in the lower arm of his favourite alpaca sweater before Christmas and I still haven’t fixed it.)
I think you did a brilliant job of it.
Those buttons are absolutely perfect! And I love the line from Guys and Dolls (in which I was both a guy and a doll once – and I was in that particular number, even, heh).
This is inspiring. If I work half as intelligently & artfully on my finished sweaters, they’d look so much better (and just the right button, doesn’t hurt either).
“A dark night on a galloping horse….” LOL! I think it would pass closer inspection than that. It came out really beautifully! I like the rolled edges, it does make it look ‘planned like that all the time’.
But what’s more, Isn’t that fun to do? Make it into a more wearable, but still beautiful sweater.
Cute button too!
Ilove this! I just Cardiganized an old sweater too– mainly because I had spilled something right down the middle. Instead of knitting a button band, though, I sewed pretty polka dot ribbon on each side for the placket. I used hooks and eyes as closures. Very simple & the stain is gone!
What wonderful buttons! The whole fix looks great to me 😀
I bow to your superior patience. It looks great! Have fun wearing it!
Holy shamoley, I’m far behind —
A wave of my Method-Two knitting needles to you, though, for the courage, temerity, and slackitude to make a cardy out of your gansey!
Can we see modelled shots? Please?